

In case you haven’t already heard (or figured out on your own), Facebook really changed the way they deliver content to their members. These days, even though you’ve “liked” our page on Facebook (you have already, right?!), there’s no guarantee that you’ll actually see all of our content in your news feed. In fact, according to this recent Wall Street Journal blog post (5th paragraph), Facebook themselves admitted that perhaps as few as 16% of a page’s fans might actually see the page content in their feed. What?! How can you make sure this you’re actually seeing the content you want to see? An awesome little known feature called Facebook Interest Lists!
We love our friends & fans on Facebook! Because of that fact, we want to make sure you guys can get to our content there as easily as possible. When I mentioned Interest Lists as a possible solution during a recent conversation among the Sisterhood writers, our lovely editors-in-chief, Christy and Melissa, asked me to write up a tutorial to try and help you all do just that!
Of course, when it comes to accessing page content on Facebook, there’s always the old tried and true method of just bypassing the news feed completely and pulling up our page manually. Will that work? Absolutely! By pulling up our page directly, you’re guaranteed not to miss a single thing. However, if you “like” a lot of pages on Facebook, that might not be the most efficient use of your Facebook time. There’s got to be an easier way, right? Right!
Welcome to the wonderful world of Interest Lists. This is a relatively new feature that was released by Facebook back in March of this year. If you’ve ever created lists in your Friends section on Facebook, Interest Lists work pretty much the same way. The big difference with Interest Lists is that you aren’t just limited to people you have as friends. Interest Lists can also include pages! It doesn’t just have to be just one or the other in an individual list either. It can be a mixture of both which is what makes this such an awesome feature that I really don’t think most people are even aware of yet.
So, how do you create one of these Interest Lists? Well, I’m glad you asked! There are a couple of different ways to accomplish that, so I thought I would run through them for you quickly. — Sorry, I had every intention of trying to do this as briefly as possible, but the IT geek in me apparently just wasn’t going to have any part of that. LOL If you want the down & dirty instructions, just kind of follow along with the screen captures and you’ll probably be able to figure it out. If you want my full information and how-to’s, then bear with me through the reading. Thanks!
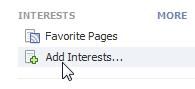
The first way is to create a new list is by using the Add Interests option found in the Interests section of the left-hand navigation pane on your news feed. If you didn’t realize it was even there, don’t feel badly. Most people don’t realize it’s there since Facebook stuck the option all the way down at the very bottom of the navigation pane. When you go to your news feed, scroll allllllll the way down to the bottom of the navigation pane and you should see something like this:
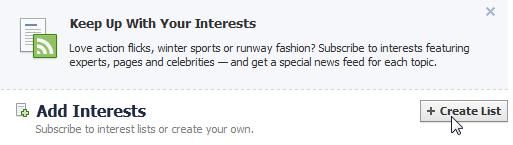
When you click on the Add Interests link, it will bring up a dialog box. From there, you can click the Create List button and then choose whatever pages or friends you would like to add to the list.
Of course, we’d love it if you would create an Interest List for our sites, so that’s what I’ll be walking you through doing. Just search through the list of available pages you’ve “liked” and find The Sisterhood of the Shrinking Jeans and click on it. That will put a little check mark in the lower right corner so you’ll know you’ve selected it. If you’re also a fan of our Shrinking Kitchen Facebook page, you can add it at the same time. (If you aren’t already, now would be a great time to “like” that page as well so you can add it to your list, too!)


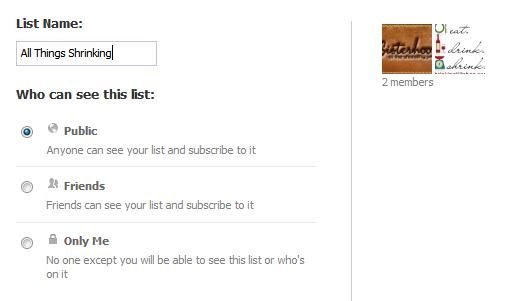
Once you’ve selected all of your desired pages, click the Next button in the lower right-hand corner of the dialog box. This will bring you to the page where you can name your Interest List and decide who can (or can’t) see your list. For this example, I named my list “All Things Shrinking” since it contains both of our pages. I won’t really go into any details on the list visibility options because their descriptions are pretty self-explanatory. If you do happen to have a question about that though, just leave a comment below and I’ll be happy to try and answer them.
Once you have your list named and have decided on the visibility of your list, you can save your list because you’re DONE! That was easy, right?! Now when you look at your left-hand navigation pane, your newly created list will be down at the bottom of the navigation page above that Add Interest option we selected back in the first step.
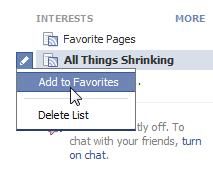
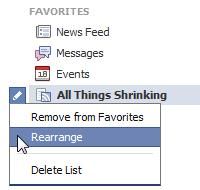
Now I don’t know about you, but having a list with some of my favorite sites being all the way down at the bottom of the page just isn’t optimal to me. I want it up higher where I can more easily see it! Never fear, dear friends! All you need to do is hover over the list name until you get the little pencil icon. You can then select to add the list to your favorites which will move it up into the top section of your navigation pane along with your news feed, messages, events, etc. Once it’s there, you can even rearrange your favorites and move it into any spot in your favorites that you like. After clicking the Rearrange link, you can drag and drop any of your favorites into any order. Just be sure to click the “done” link once you have everything arranged the way you want in order to save your changes.
There you have it! You’ve now created your first Interest List, added it to your Favorites, and then arranged it just the way you like. Now that you have it done, whenever new posts are added to any of the pages or friends you have in that particular Interest List, there will be a little number displayed next to the list name indicating the number of unread items. When you open the list, the counter is reset which means you never have to wonder whether a particular list has new items because Facebook will let you know. How cool is that?! I seriously have NO idea why Facebook doesn’t promote this feature more. I love it!
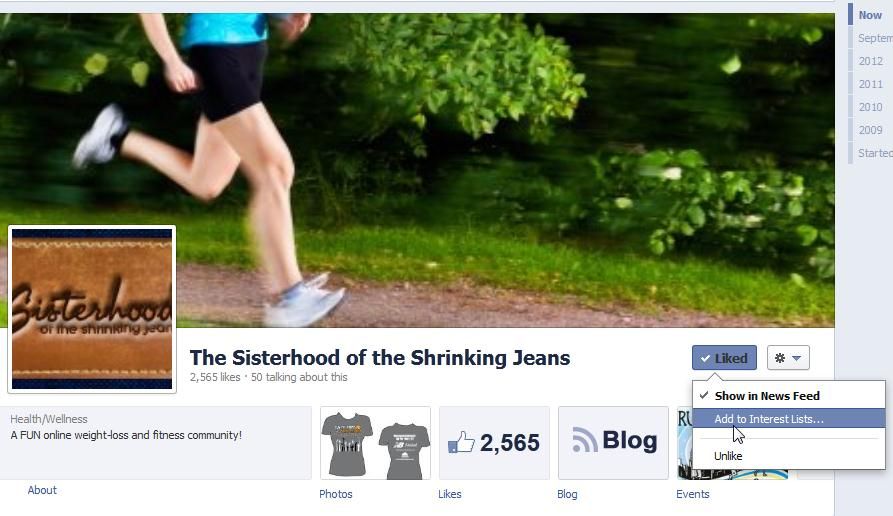
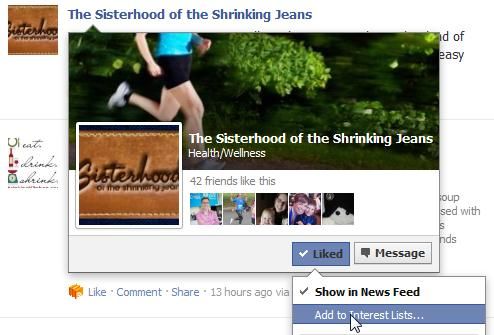
Now that you’ve mastered creating lists manually from the Add Interests option, there are some quicker ways you can do it in the future to either add new pages/friends to an existing Interest List or to even create new lists completely. The way to do this is either directly from the desired page using the “Liked” button, or by hovering over the page name in your news feed and accessing the “Like” button from there.
Using either of these methods, you will then get the option to add it to an existing list or to create a completely new list.
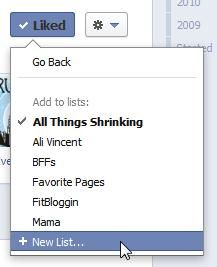
If you want to add it to an existing list, just click the list name to which you want to add it. If you want to create a new list, click that option. It will then take you through basically the same steps I outlined above, but the page will already be selected for you so you don’t have to actually search for it.
I know this hasn’t been short and computer-related tutorials can be pretty boring. I really appreciate those of you who’ve held out this far. 😉 Again, if you have any questions, just ask. You can either leave it as a comment below or you could leave it over on our Facebook page, too. I’ll be checking in both at places periodically throughout the day to answer questions.
So, what do you think about Interest Lists? Do you plan on giving them a try if you’re on Facebook? If you think, try to think about other pages (beside our two, of course!) that you might want to add when it comes to health, fitness, wellness, etc. A few of our long-time friends here at the Sisterhood that come immediately to mind are MizFitOnline, Roni, FitBloggin‘, Click Espresso Protein Drink, McCormick Spice, New Balance, etc. The possibilities are endless!
P.S. – There is also a way to create similar lists on Twitter as well. Do you guys know how to do that? If not, would you be interested in a detailed tutorial on that as well? Just let me know!